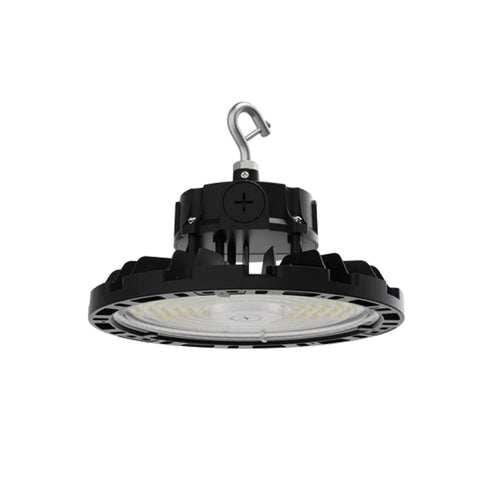
When it comes to lighting, many people might think wiring a fixture is too involved for their level of experience. Just because you have never wired a fixture before, doesn’t mean you should be too intimated to try it out. It is actually a simple task. While there are wiring tasks that might be more advanced and should be done by a professional, a relatively easy task is high bay sensor wiring. Adding a sensor to your fixture is a great way to save money and energy while extending the life of the fixture. A sensor means the light will only be on when there are occupants or illumination is needed.
Here are a few basic steps to help you try high bay sensor wiring for yourself. These suggestions are made based on adding a high bay passive infrared occupancy sensor to a standard high bay fixture. You can use these guidelines for adding other types of sensors as well.
- Open the fixture by removing the screws and locate your existing wires on the fixture.
- Find your leads and disconnect the power from the quick disconnect.
- Pop open the sides of the fixture to get better access to your wiring system.
- If you are working with a three-wire layout, as most fixtures tend to operate on, you need to remember that two wires need to be set up as two power wires and one load wire to get it to work properly without overpowering your system.
- Most wires are sold in lengths that are extra-long just in case. Trim your wires to be slightly more than what you need. A good rule of thumb for most fixture wiring jobs is to cut it down by about two feet.
- Use three different color wires since you are working a three-wire layout. This will help you keep the three components of neutral, ground, and power wires.
- Strip your wires. You want to strip the leads about an inch or so for the best results.
- Fish the wires through the fixture through wherever the wiring components are in your particular fixture.
- Connect your power leads. Remember, one wire for load bearing, and two for power bearing.
- Connect your sensor wires and fixture wires in accordance with the setup you have chosen. For example, make sure your power wires on the fixture are connected to the power wires in the sensors and not the load bearing.
- Connect it to the switch leg and lamps.
- Trim down any extra wiring.
Of course, when it comes to something that seems as involved as wiring a fixture, it is always great to have a visual representation of the steps to follow. Here is a great video walking you through it in more details step by step.
You May Also Be Interested in These Articles...
5 Tips for High Bay Light Shopping
Finding the right lighting solutions for your unique location can be a daunting task, especially if you have what is considered a high ceiling. A high ceiling requires lighting solutions made fo...
Read Article
Home Depot High Bay Fixtures VS. Warehouse Lighting Fixtures
Watch our Home Depot High Bay Fixtures VS. Warehouse Lighting Fixtures Product Review video. Our videos will educate you so that you can confidently purchase and install LED light fixtures, whether...
Watch Video
High Bay Vapor Tight T5/T8 Lighting Fixtures
When it comes to finding the right lighting solution, you should first consider if it is an indoor or outdoor area. The area will always determine the lighting solution options. With our h...
Watch Video High Bay LED Lighting
 Industrial Low Bay Lighting
 Industrial Strip Lights
 Vapor Tight Lighting
 LED Shop Lights
 Hazardous Area / Explosion Proof Lighting
 Loading Dock Lights
 Construction / Portable Lighting
 Industrial Ceiling Fans
 LED Work Lights
 Networked Controlled Lighting
 NEW Lighting
 Clearance
 Troffer Lights
 LED Flat Panel Lights
 Drop Ceiling Lights
 Suspended LED Lights
 LED Cylinder Lights
 Exit / Emergency
 Wrap Lighting Fixtures
 Gooseneck and Barn Lights
 Stairway & Corridor Lighting
 Hospital Bed Lights
 Commercial Sign Lights
 Recessed Lighting
 Wafer Lighting
 RGB LED Lights
 Grow Lights
 UV Disinfecting Lights & Air Purifier Fixtures
 Refrigeration Lighting
 LED Flood Lights
 Outdoor Wall Lights
 LED Area Lights
 Parking Lot Lights & Poles
 Outdoor Post Top Lights
 LED Stadium Lighting
 Canopy Lights
 Security & Motion Sensor Lights
 LED Bollard Lights
 Outdoor LED Linear Light Fixtures
 Solar Powered LED Lighting
 Dusk to Dawn Lights
 Landscape Lighting
 Outdoor String Lights
 Coastal Wildlife Lighting
 Outdoor House Lights
 Architectural Linear Lights
 Architectural Grid Mount Lights
 Architectural Round Pendant Lights
 Architectural Square Linear Lights
 Architectural X-Shaped Linear Lights
 Architectural LED Wall Packs
 Ceiling Fans
 Ceiling Lights
 Chandelier Lights
 Pendant Lighting
 Island Lights
 Track Lighting
 Under Cabinet Lighting
 Vanity Lights
 Wall Sconces
 LED Tape Lights
 LED Mirrors
 LED Light Bulbs
 LED Tube Lights
 LED Corn Lights
 Vintage LED Bulbs
 Decorative LED Bulbs
 Fluorescent Light Bulbs
 Metal Halide Lamps
 LED Magnetic Strip Retrofit Kits
 LED Strip Light Retrofit Kits
 High Bay LED Retrofit Kits
 LED Troffer Retrofit Kits
 LED Wall Pack Retrofit
 LED Street Light Retrofit Kits
 Recessed Lighting LED Retrofit Kits
 Ballasts & Drivers
 Emergency Ballast For LED & Fluorescent Lights
 Electrical Supplies & Mounting Kits
 Electrical Tools
 Switches & Receptacles
 Electrical Power Cords
 Sensors and Timers
 Smart Home Automation
 High Bay Occupancy Sensors
 Electric Vehicle Chargers
 Hand Dryers
 LED Shop Lights
 Office Lights
 Classroom Lights
 Church Lights
 Gym Lighting
 Factory Lights
 Hospital Lights
 Walkway Lights
 Parking Lot Lights
 Exterior Building Lights
 Sports Lighting
 Airport Lights
 NSF Rated Lights
 Restaurant Lights
 Corridor Lights
 Barn Lighting


